Toilet partition privacy strips solve a common problem in public restrooms by blocking unwanted gaps between stall doors and frames. These simple additions significantly improve user comfort and privacy.
We at Partition Stalls see many facilities struggle with inadequate stall privacy. Installing these strips properly requires the right tools, materials, and technique to achieve lasting results.
What Makes Privacy Strips Essential
The Privacy Strip Solution
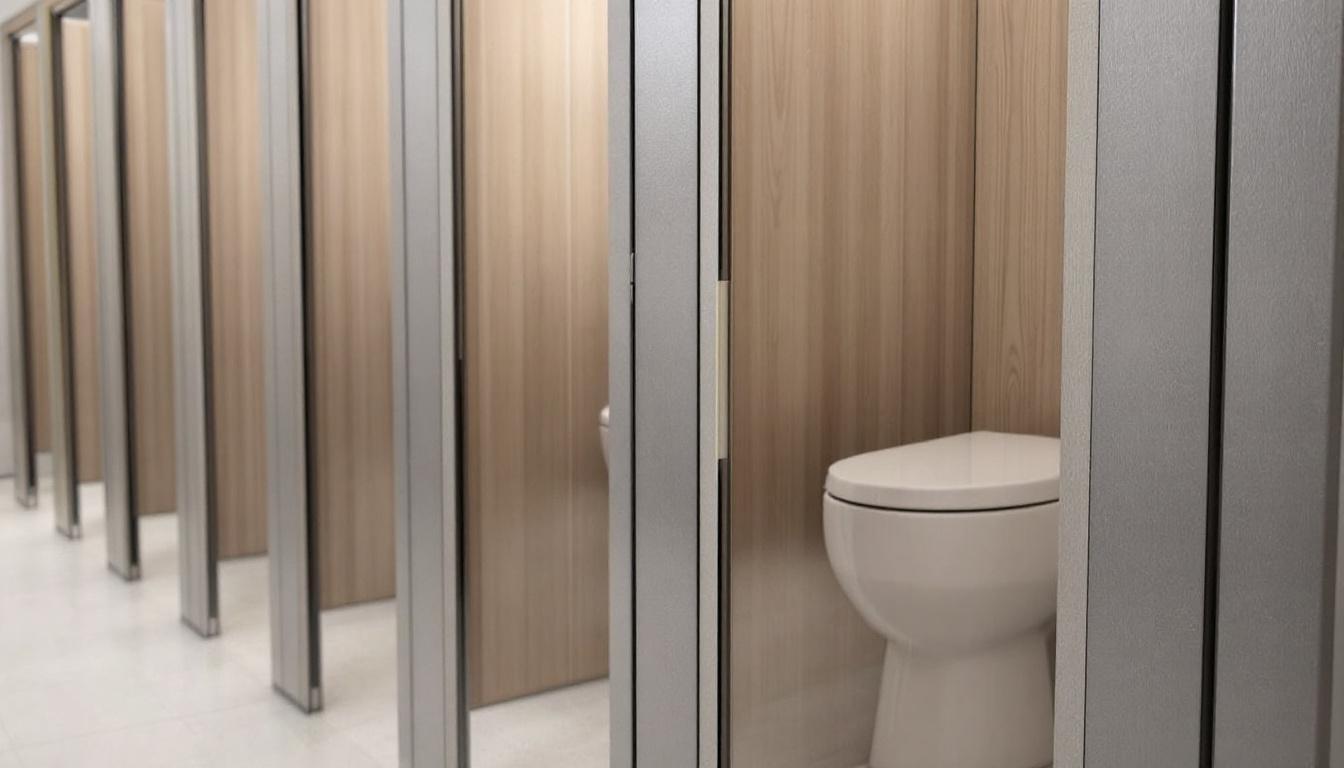
Privacy strips are narrow aluminum or stainless steel channels that mount vertically along the edge of toilet partition doors and pilasters. These strips eliminate the typical 3/8-inch to 1/2-inch gaps that exist between doors and frames in standard partition installations. The strips measure 60 to 72 inches in length and cost between $9.50 and $10.50 per pair (making them an affordable privacy upgrade).
Most commercial restrooms have visible gaps that compromise user privacy and create discomfort. Privacy strips address this issue as they create a continuous barrier that blocks sightlines while they maintain proper door operation. The strips attach with self-threading screws and work with both inswing and outswing door configurations.
Material Options and Performance
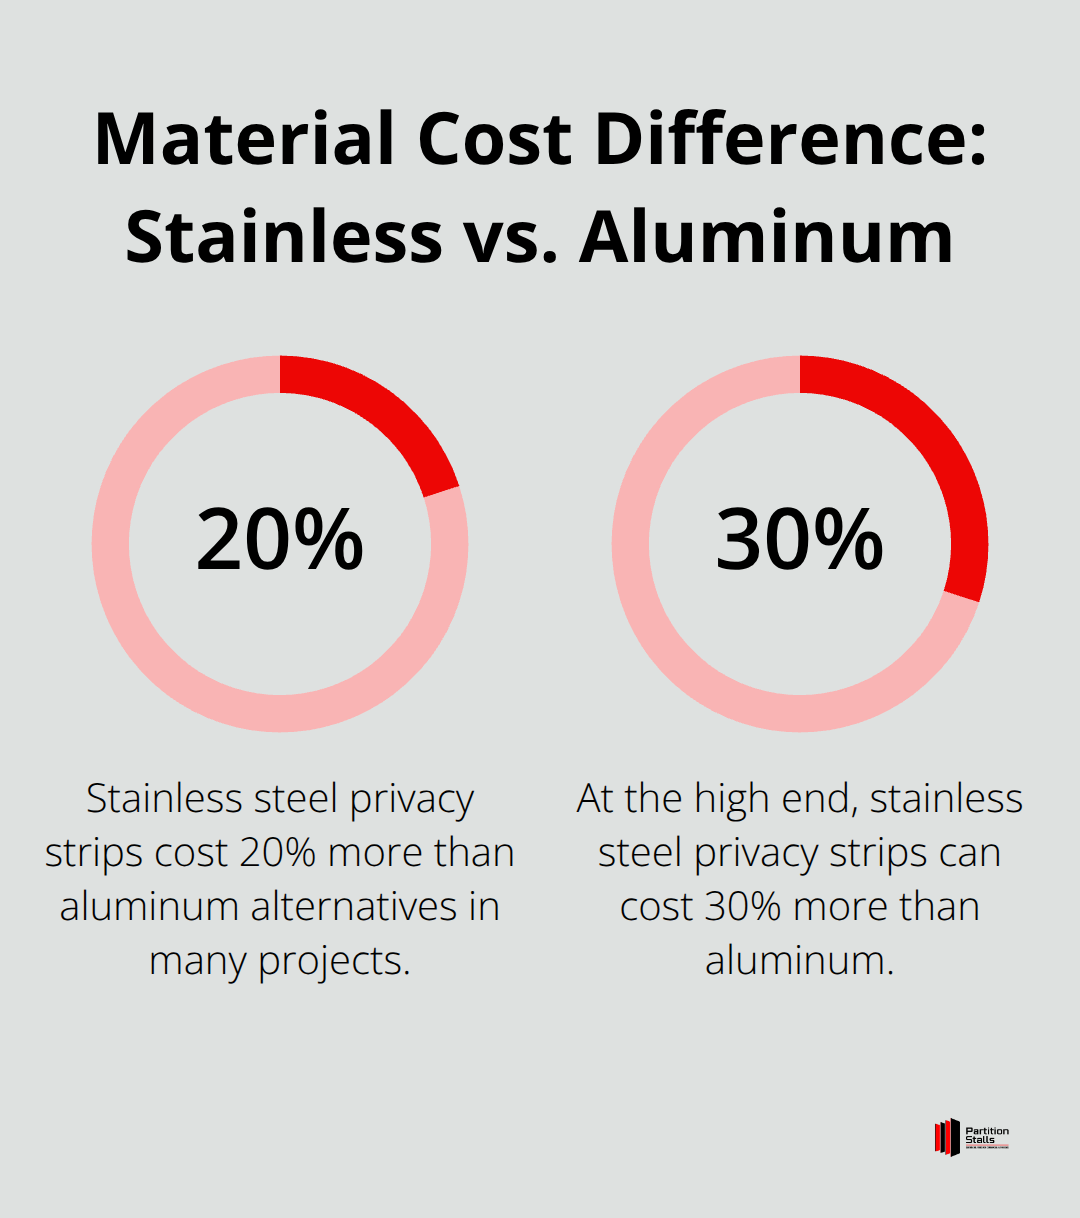
Aluminum privacy strips dominate the market due to their corrosion resistance and lightweight properties. Clear anodized aluminum provides the best aesthetic consistency with modern restroom designs. Stainless steel options offer superior durability in high-moisture environments but cost 20-30% more than aluminum alternatives.
Powder-coated steel strips work well in standard commercial applications but show wear faster than aluminum in humid conditions. Solid phenolic strips resist moisture damage but require specialized hardware for installation. The material choice directly impacts longevity, with aluminum strips providing long-term performance in commercial environments.
Performance Benefits and User Impact
Privacy strips improve restroom privacy according to facility management studies. The installation process takes 10-15 minutes per door and requires only basic tools. Properly installed strips eliminate gaps without they affect door swing clearances or ADA compliance.
The strips also reduce maintenance issues as they prevent debris accumulation in door gaps. Facilities report fewer privacy-related complaints after they install continuous door stops and privacy strips together. This combination creates a professional appearance while it addresses the most common restroom privacy concerns.
With these benefits clear, the next step involves preparation and tool selection for proper installation.
Tools and Materials Needed for Installation
A power drill with variable speed control serves as the primary tool for privacy strip installation. Choose a drill with at least 18 volts to handle self-threading screws through aluminum and steel materials. Drill bits sized 1/8 inch work best for pilot holes in most partition materials.
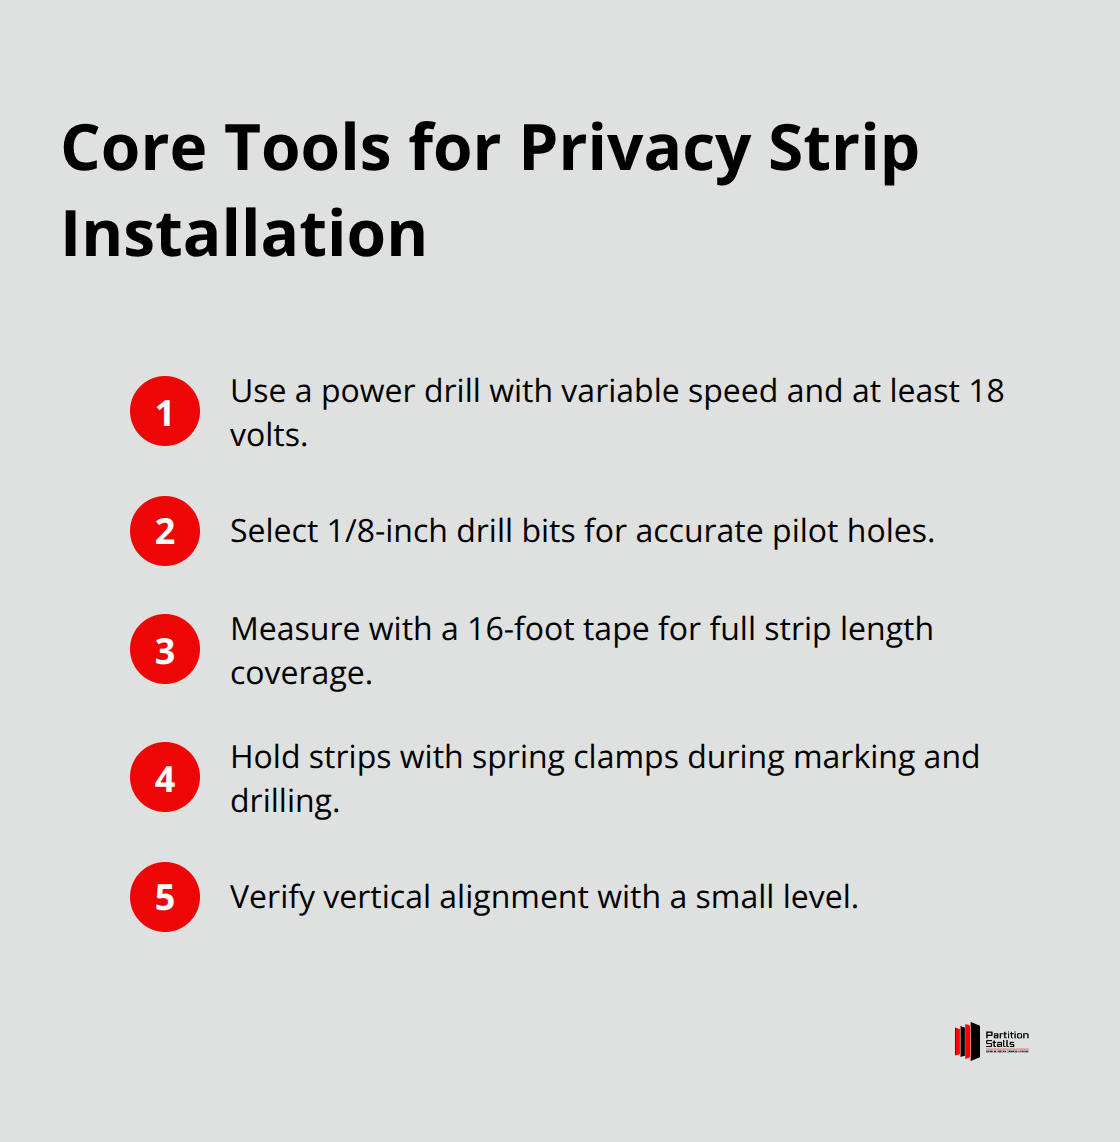
A tape measure with a 16-foot length provides adequate reach for privacy strips. Spring clamps hold strips in position during the marking and drilling phases.
Essential Hardware Components
Self-threading screws create the strongest connection between privacy strips and partition materials. Use #10 x 3/4 inch screws for aluminum strips and #10 x 1 inch screws for thicker materials. These screws eliminate the need for pre-drilling in most cases and provide secure attachment points. A small level verifies strip alignment before final fastening. Keep extra screws on hand (typically 8-10 per strip) to account for any installation adjustments.
Material Selection and Costs
Aluminum privacy strips cost $9.50 to $10.50 per pair and provide the best balance of durability and price. Clear anodized aluminum maintains appearance consistency with existing partition hardware. Stainless steel strips increase project costs by 20-30% but offer superior performance in high-moisture facilities. Powder-coated steel options work well in standard commercial applications but show wear faster than aluminum in humid conditions.
Safety Equipment and Workspace Preparation
Safety glasses prevent metal shavings from entering eyes during drilling operations. Work gloves protect hands from sharp aluminum edges and provide better grip control. A chalk line helps mark vertical alignment points along door edges. Clear the work area of obstacles and position a step stool for reaching upper mounting points on privacy strips. Proper preparation reduces installation time and prevents common alignment errors.
With your tools and materials ready, the actual installation process requires precise measurement and careful positioning to achieve professional results.
How Do You Install Privacy Strips Correctly
Initial Measurements and Positioning
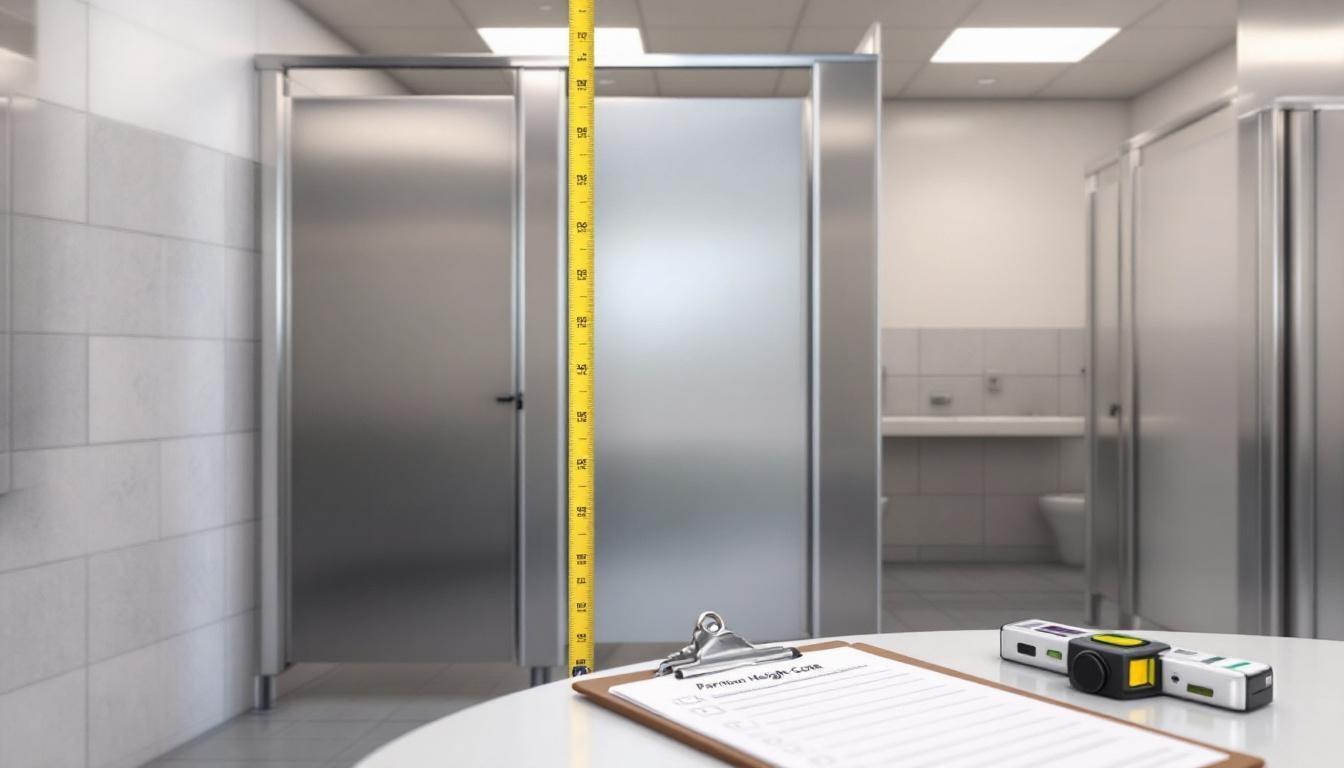
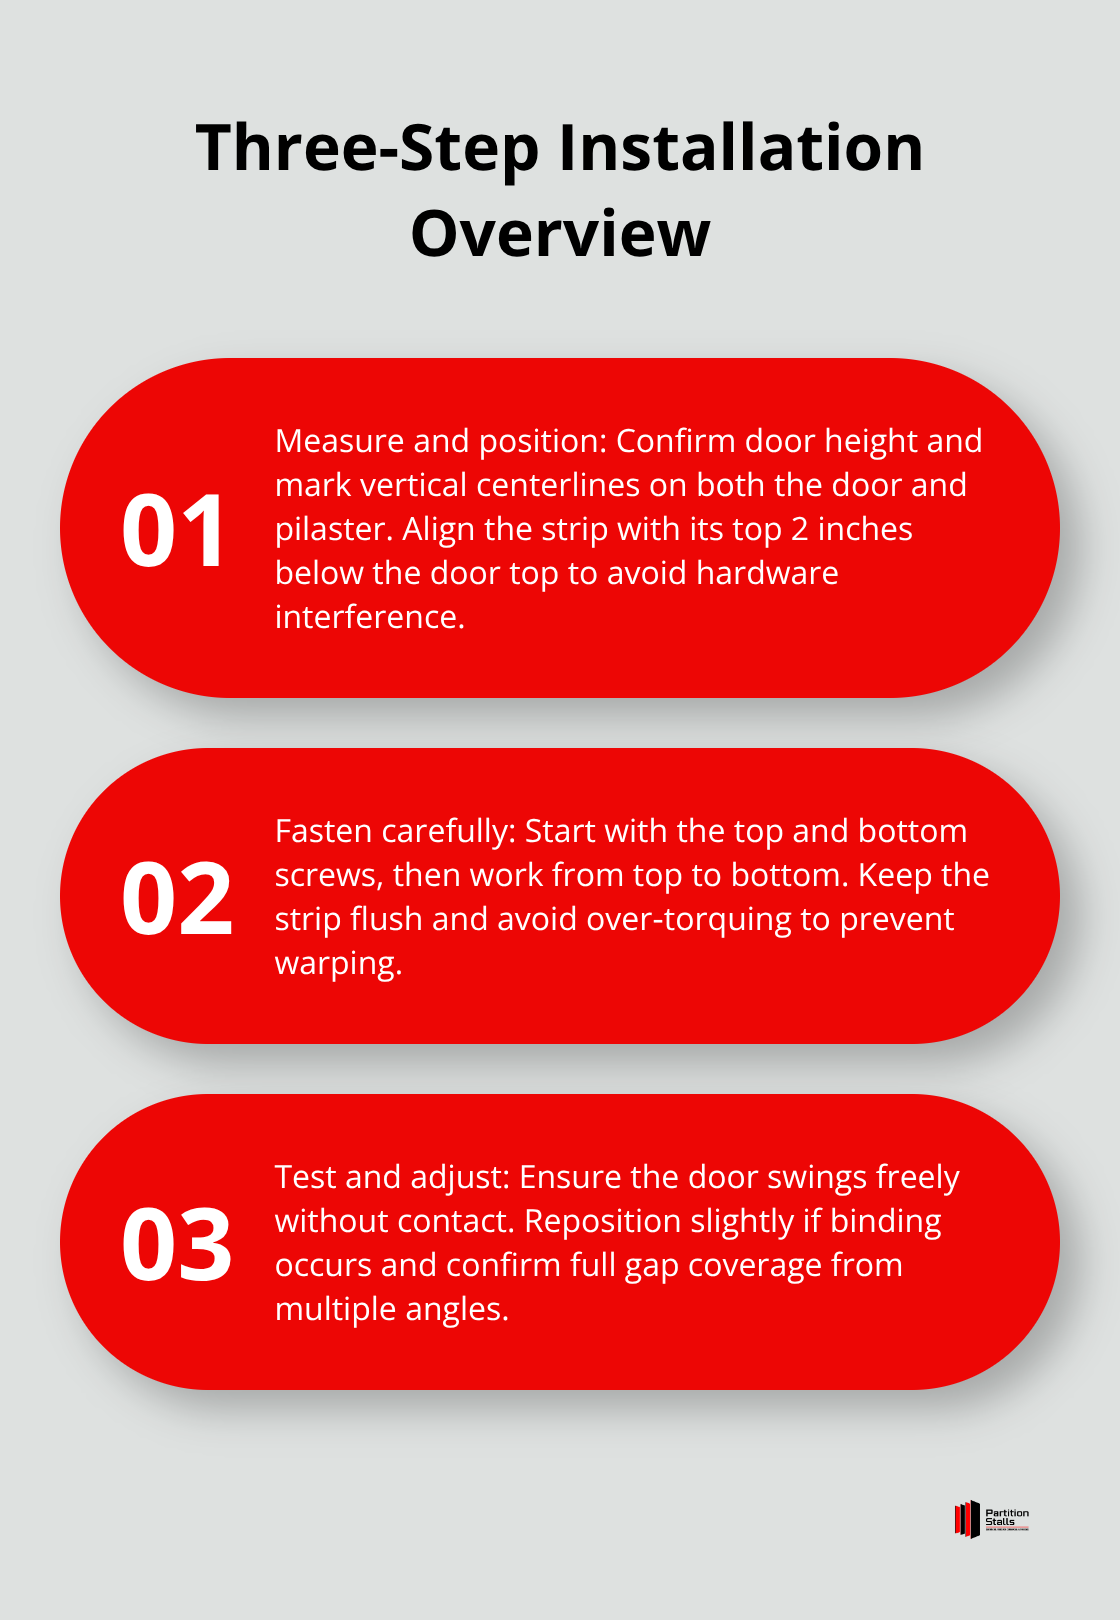
Measure the exact door height from the floor to the top of the partition door. Standard toilet partition doors measure 58 inches in height, but verify this measurement as variations exist between manufacturers. Mark the vertical centerline on both the door edge and the corresponding pilaster edge with a chalk line. Position the privacy strip against the door edge with the top of the strip aligned 2 inches below the door top.
This placement prevents interference with door hardware while it maintains maximum privacy coverage. Use spring clamps to hold the strip in place and mark screw hole locations every 8 to 10 inches along the strip length (typically 6-8 holes per strip). Pre-drill pilot holes with a 1/8-inch drill bit to prevent aluminum cracking during screw installation.
Screw Installation Process
Drive self-threading screws through the marked holes with steady, consistent pressure to avoid strip warping. Start with the top and bottom screws first to establish proper alignment, then install the remaining screws from top to bottom. The strip should sit flush against the door edge with no gaps or bowing between mounting points.
Apply even pressure when tightening screws to prevent over-torquing that can damage the aluminum material. Each screw should penetrate the door material by at least 1/2 inch for secure attachment. Check strip alignment after each screw installation to maintain straight vertical positioning.
Testing and Final Adjustments
Test door operation immediately after installation to verify proper clearance. The door should swing freely without the strip contacting the pilaster or frame during operation. Adjust strip positioning if binding occurs by loosening screws and repositioning slightly outward from the door edge.
Check the gap coverage from multiple angles to confirm complete privacy protection. A properly installed strip eliminates all sightlines while it maintains smooth door operation. Repeat this process for the pilaster side if you install a full privacy system with strips on both door and frame edges for maximum gap elimination.
Final Thoughts
Professional toilet partition privacy strips installation delivers immediate privacy improvements and long-term value for commercial facilities. The $9.50 to $10.50 investment per pair eliminates gaps that compromise user comfort while it maintains full door functionality. Proper installation prevents common issues like strip warping, screw loosening, and alignment problems that occur with rushed installations.
Regular maintenance extends toilet partition privacy strips lifespan significantly. Clean strips monthly with mild detergent to prevent buildup that can cause corrosion. Check mounting screws quarterly and retighten any loose connections before they create alignment issues (replace strips that show visible wear or damage to maintain consistent privacy protection).
Complex installations that involve multiple stalls, custom configurations, or challenging wall conditions benefit from professional expertise. We at Partition Stalls provide comprehensive restroom solutions that include privacy strip installation, partition replacement, and facility upgrades. Our team handles everything from initial consultation to final installation.