Toilet partition hardware might seem straightforward, but improper installation leads to squeaky doors, misaligned panels, and safety issues that frustrate users and damage your facility’s reputation.
We at Partition Stalls know that getting the hardware right makes the difference between a partition system that lasts decades and one that fails within years. This guide walks you through every component, from hinges to fasteners, so you can install with confidence.
Understanding Toilet Partition Hardware Components
The Three Core Hardware Categories
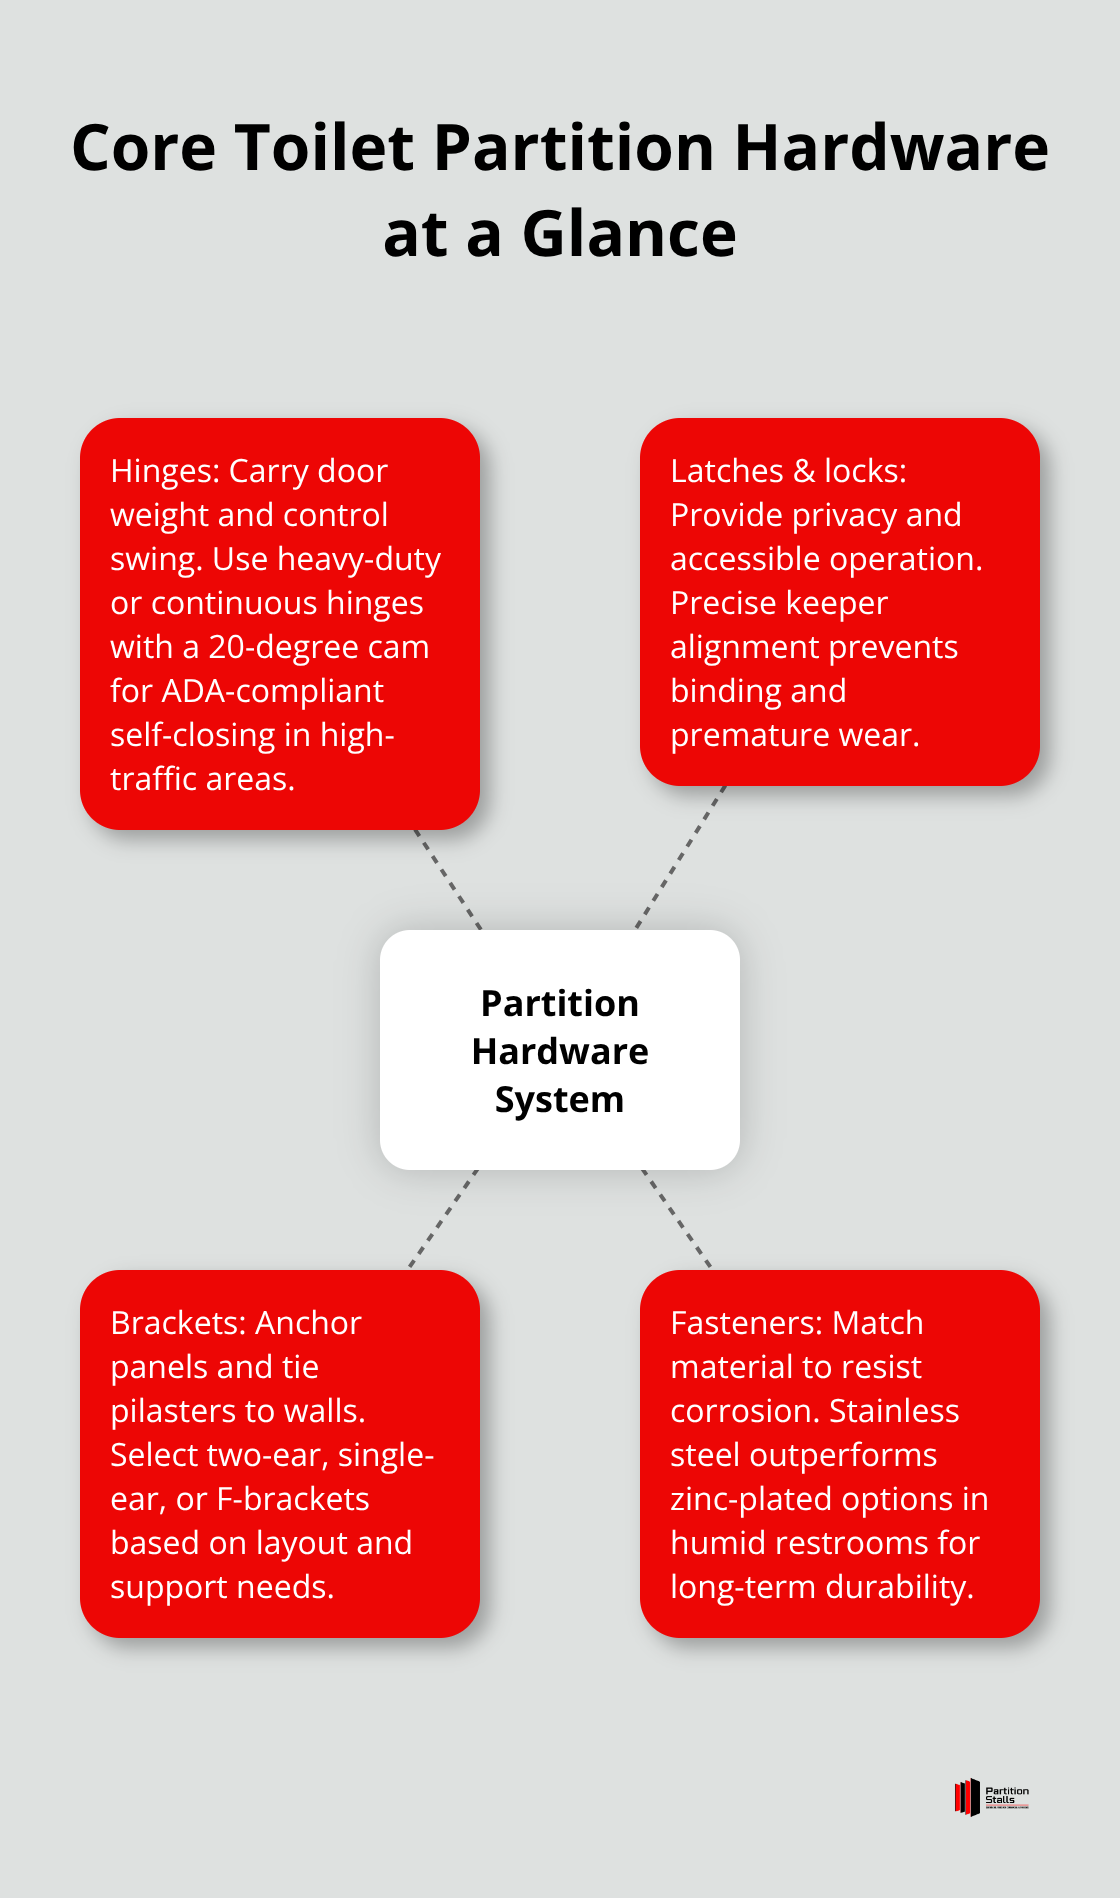
Toilet partition hardware falls into three functional categories that work together to create a system. Hinges carry the door weight and allow it to swing, latches and locks control access and privacy, and brackets plus fasteners anchor everything to the partition panels and building structure. Understanding which hardware type serves which purpose prevents costly mistakes during installation.
Hinges: Selecting the Right Type for Your Application
Heavy-duty vault hinges rated for 3/4-inch to 1-inch thick solid plastic doors deliver superior durability in high-traffic facilities, while standard butt hinges work fine for lighter laminate or phenolic applications. Full-length continuous hinges spanning 54 inches with 20-degree cam close mechanisms meet ADA compliance requirements and provide self-closing action automatically. The hinge material matters significantly-stainless steel resists corrosion in moisture-heavy restroom environments far better than zinc-plated alternatives, which can degrade within five years in commercial settings.
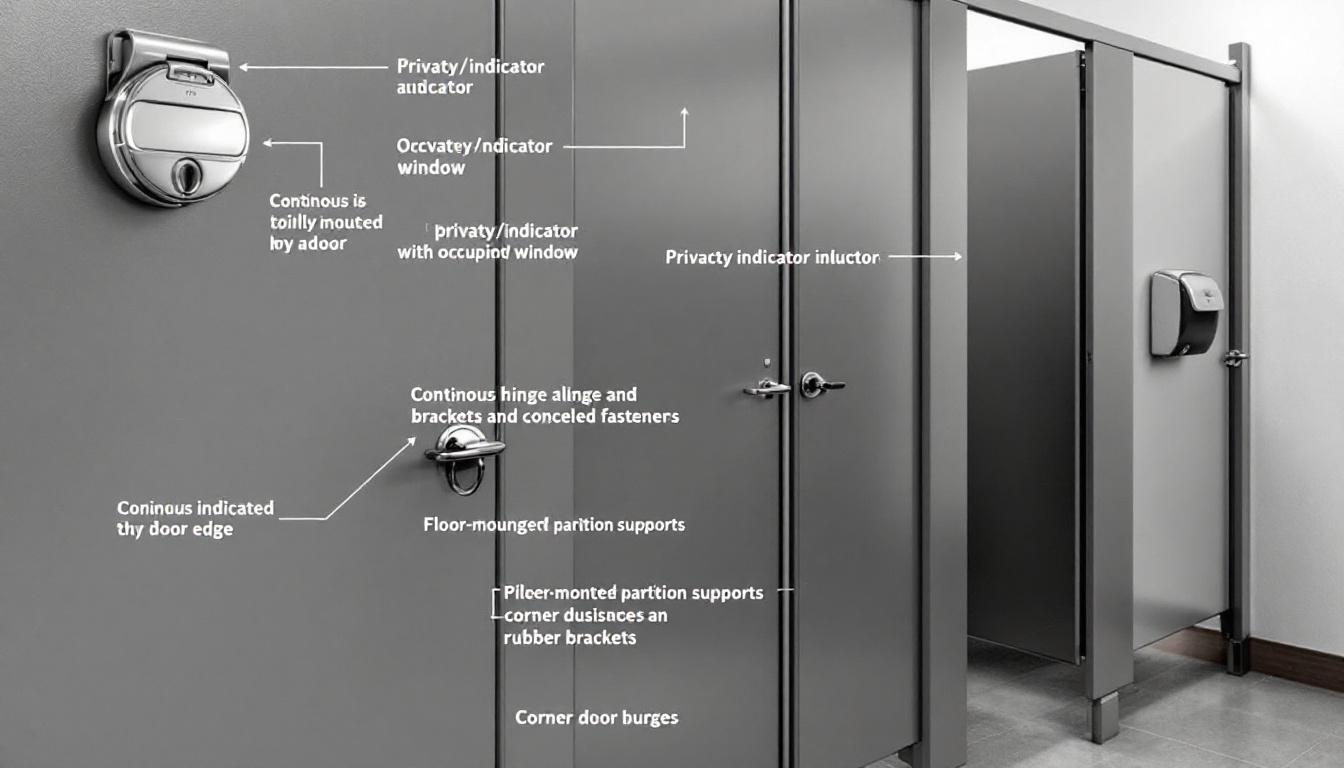
Door Latches and Locking Mechanisms
Door latches come in two main varieties: privacy latches for standard stalls and ADA turn latches for accessible compartments. Privacy latches typically feature a simple push-button or turn mechanism that locks from inside, while ADA turn latches use a 1.25-inch minimum diameter handle that accommodates users with limited hand dexterity. Keepers and strike plates must align precisely with the latch mechanism-even 1/8-inch misalignment causes binding that frustrates users and accelerates wear on the latch components.
Brackets, Fasteners, and Structural Support
Brackets and fasteners form the structural backbone of any partition system. Two-ear wall brackets support most panel configurations by anchoring panels to walls on both sides, while single-ear brackets handle corner stalls where only one wall connection exists. Pilaster brackets, often called F-brackets, secure vertical support posts that connect multiple panels together. The fastener selection depends entirely on your partition material-phenolic and solid plastic require different screw types than laminate or metal substrates. Corrosion-resistant fasteners like stainless steel or zinc-plated options prevent rust staining that degrades the partition appearance and can compromise structural integrity.
Matching Hardware Kits and Floor Stabilization
Most manufacturers supply complete installation kits containing matching top and bottom hinges, latches, keepers, and security screws sized for their specific partition thickness. Installing mismatched hardware from different manufacturers creates alignment problems that become nearly impossible to correct after panels are mounted. Floor anchors and wedge systems stabilize the entire partition row by preventing rocking or flexing. Adjustable legs compensate for uneven floors in restroom installations. Hardware installation guides from major brands like Bobrick, Scranton, Bradley, ASI, and Hadrian provide exact specifications for hole spacing, screw sizes, and bracket orientation. Consulting these manufacturer-specific guides before drilling holes eliminates the risk of installing components backward or upside down, which happens more often than facility managers realize. With your hardware components identified and understood, the next step involves careful planning to measure your space accurately and select hardware that matches your specific partition material.
Pre-Installation Planning and Hardware Selection
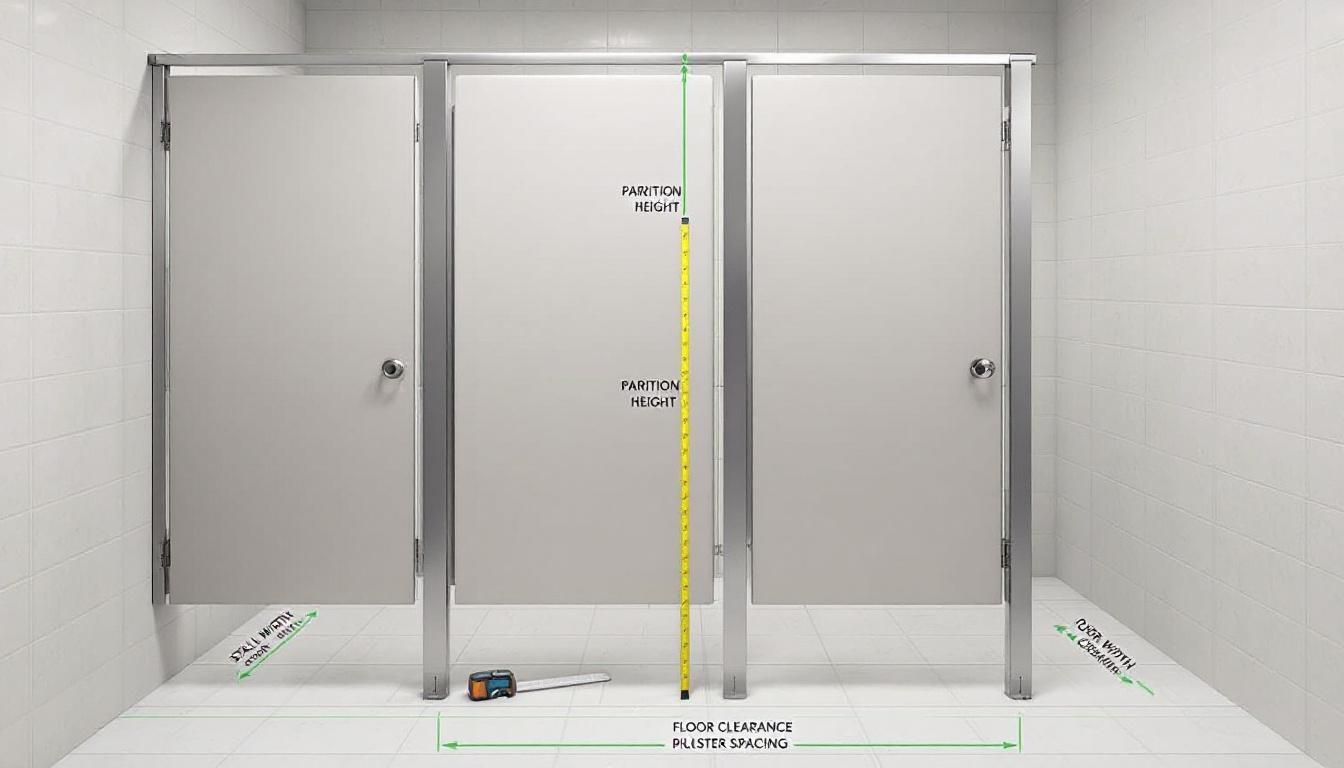
Measurement errors at the start cost you time and money later. Measure your restroom space three times before ordering any hardware, checking wall-to-wall distance at floor, mid-height, and ceiling level since most restroom walls are not perfectly plumb. Uneven floors are the norm in commercial facilities, not the exception, and they directly impact hardware performance. If your floor slopes more than 1/4 inch over a 10-foot span, adjustable legs become mandatory rather than optional to prevent doors from swinging open or closed on their own.
Establishing Your Centerline and Anchor Points
Mark your intended partition centerline on the floor with chalk, then measure from that line to each wall anchor point where brackets will mount. Most facilities install partitions 18 inches from the wall to accommodate plumbing and allow cleaning access behind the stalls. Accurate measurements are essential before you start, and photographing your measurements and floor conditions before placing any order prevents disputes with installation crews and helps you catch problems early.
Matching Hardware to Your Partition Material
The material your partition uses determines which hardware works and which does not. Solid plastic doors thicker than 7/8 inch absolutely require heavy-duty vault hinges rated for that thickness, while laminate panels work with standard butt hinges rated for lighter materials. Phenolic core partitions demand stainless steel fasteners to prevent corrosion and rust stains that permanently mark the partition surface.
Powder-coated steel partitions tolerate zinc-plated fasteners better but still benefit from stainless steel for longevity in humid restroom environments. Check the manufacturer’s installation guides from Bobrick, Scranton, Bradley, ASI, or Hadrian to confirm exact screw sizes, hole spacing, and bracket types for your specific partition material before drilling anything. Installing mismatched hardware combinations from different manufacturers creates alignment problems that cascade through the entire system, making doors bind and panels flex excessively.
Essential Tools and Equipment
Proper tools separate successful installations from frustrating ones that leave you with gaps, squeaky hinges, and callbacks. You need a quality level at least 24 inches long to verify that pilasters stand truly vertical, a chalk line for marking centerlines and anchor points accurately, and a plumb bob for checking vertical alignment in tight corners. A drill with both standard and Torx bits handles the security screws that partition manufacturers use.
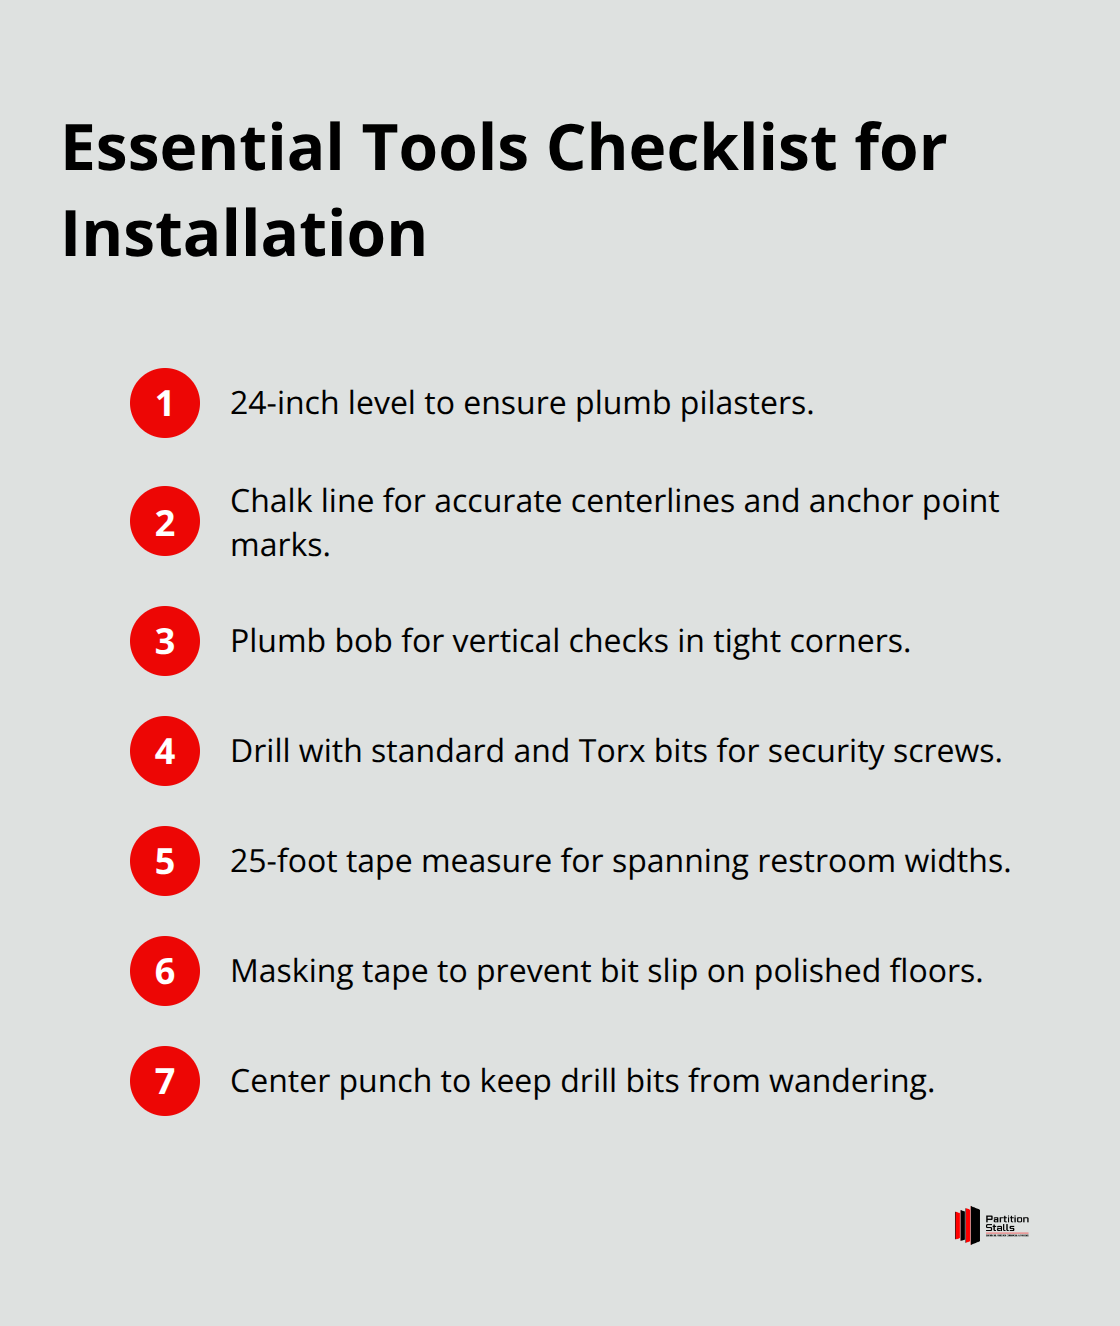
A tape measure at least 25 feet long helps you span the entire restroom width in one measurement, reducing the error that comes from chaining measurements end-to-end. Masking tape marks your drilling locations so your drill bit does not slip on polished floors-a critical step most installers skip. A center punch creates a small divot before drilling through metal or hard plastic substrates, preventing your drill bit from wandering and creating oversized holes that compromise bracket fit.
Preparing Your Team and Timeline
Wooden shims adjust for uneven floors and walls without damaging partition surfaces, and you should have at least a dozen on hand. A helper is not optional for installations involving panels wider than 24 inches or doors made from solid plastic, as two people can safely handle heavy components while maintaining proper alignment and preventing injuries. Most facilities underestimate how much time layout takes, so budget at least two hours for measuring, marking, and verifying everything before drilling begins.
With your space measured, hardware selected, and tools assembled, you now move into the actual installation process where precision in mounting hardware determines whether your partition system operates smoothly for years or develops problems within months.
Installing Hardware Without Creating Misalignment Problems
Start with Floor Anchors, Not Wall Brackets
Floor anchors establish the vertical reference line for everything that follows, and skipping this step forces you to chase alignment problems through every subsequent component. Use a chalk line to mark where your floor anchors should go, measuring carefully from your centerline to ensure the first anchor sits exactly where your layout drawings specify. Wedge anchors driven into concrete require a minimum 2″ deep hole penetration into minimum 3″ thick structural concrete, and you should tap the anchor down until the wedge sits flush with the floor surface. Floor preparation requires level surfaces within 1/4 inch tolerance to prevent door alignment issues, so most installers avoid leaving the anchor proud of the floor, which creates a rocking point that destabilizes the entire partition row over time.
Mount Wall Brackets on Solid Backing
Once your floor anchors are set, mount the wall brackets at the exact height specified in your manufacturer’s guide, typically 69 to 72 inches depending on your partition height. Wall brackets must sit on solid backing, never on drywall alone, so confirm your wall has blocking or studs behind each bracket location before drilling pilot holes. Drill pilot holes with a 3/16-inch bit for 1/4-inch fasteners, and use stainless steel lag bolts rather than screws for wall mounting since bolts handle the shear forces that develop when someone leans against a partition door.
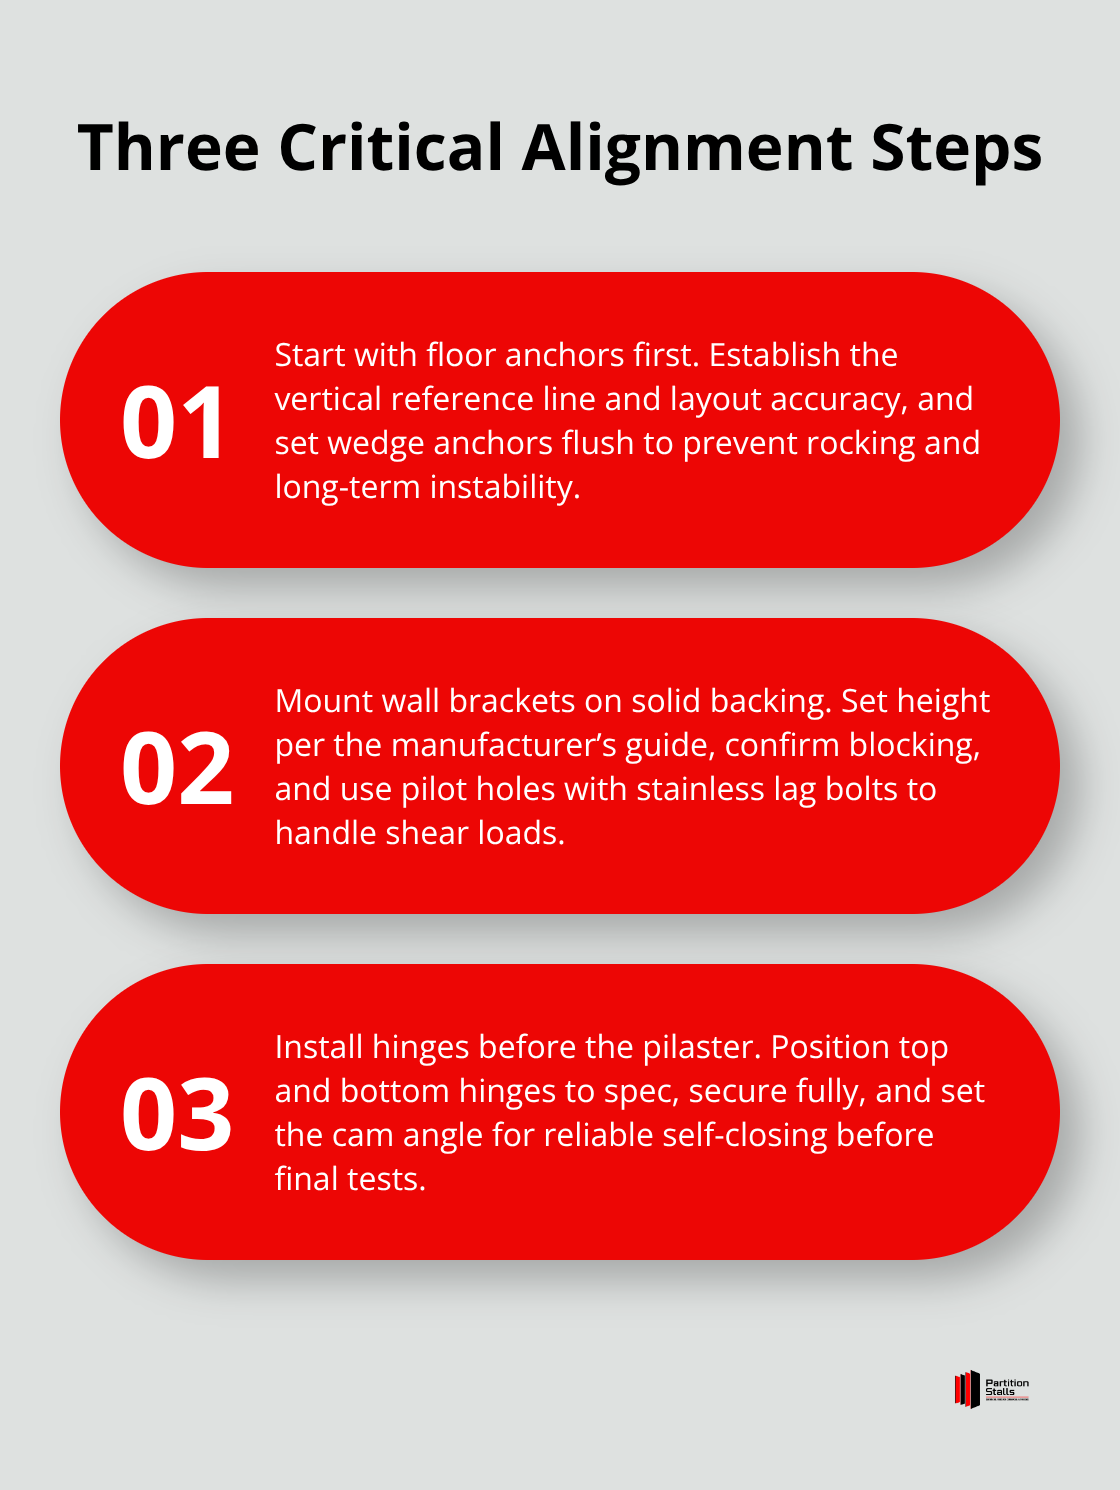
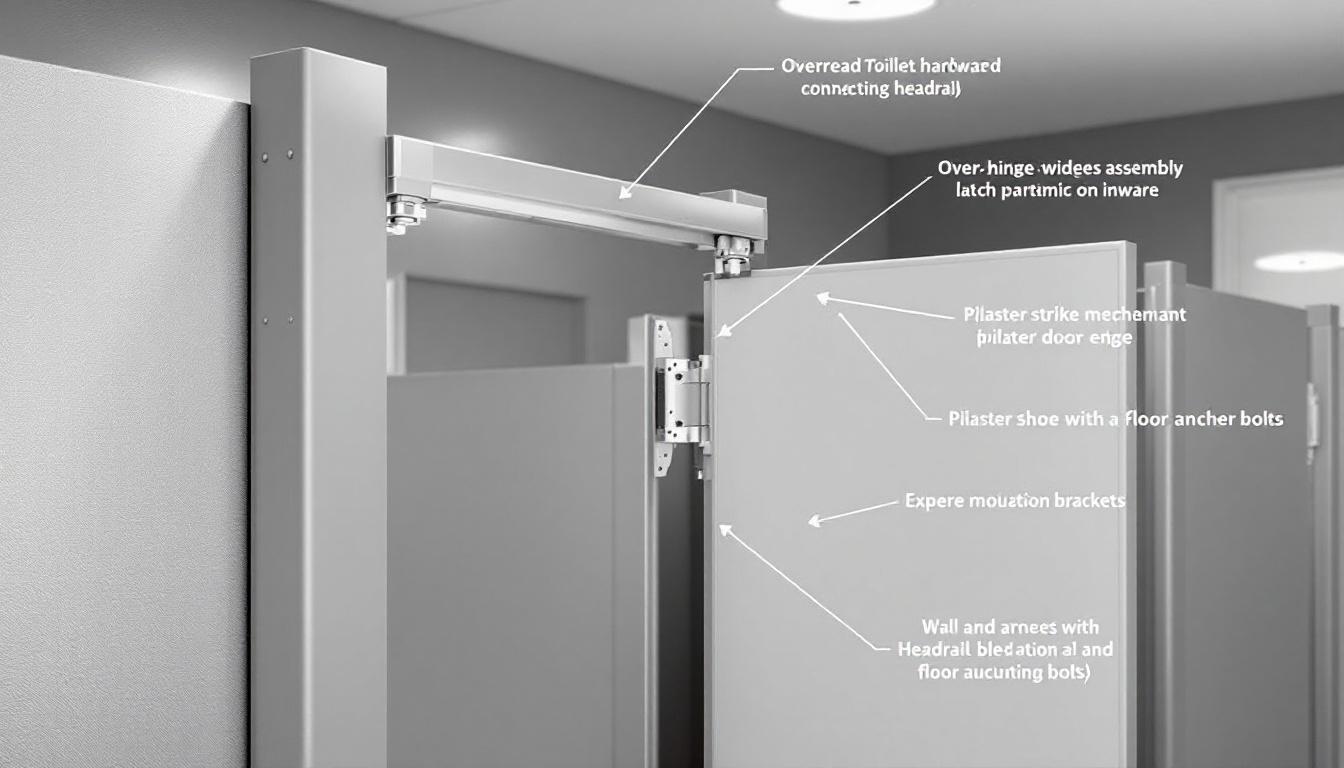
Install Hinges Before the Pilaster
Mount your hinges to the pilaster before installing the pilaster itself, because attempting to align hinge holes after the pilaster is bolted to the floor and wall becomes nearly impossible in a confined space. Position your top hinge 2 inches from the pilaster top and your bottom hinge 10 inches from the floor, then verify this spacing against your manufacturer’s specifications since some brands require different dimensions. Install the hinge cam that controls door closing action only after both hinges are fully secured, as the cam angle determines how quickly your door swings closed and whether it closes completely. A 20-degree cam provides self-closing action that meets ADA requirements, but installers often skip testing the door swing after installation and discover binding or slow closure only after the facility opens.
Hang the Door and Check Alignment
Hang your door on the hinges and check the gap between the door and pilaster at the top and bottom, which should measure 1/8 inch on each side for proper operation. If your gap exceeds 1/4 inch at the bottom, your pilaster is not plumb, and you need to adjust your floor anchors or shims before tightening any fasteners permanently. Door keepers must align with the latch, and even small misalignments cause doors to bind or fail to latch completely. Test your door swing through its full range of motion at least ten times before considering the installation complete, because this reveals binding points that you can still adjust rather than discovering them after your facility opens to users.
Final Thoughts
Successful toilet partition hardware installation rests on three fundamentals: accurate measurements before you start, hardware that matches your partition material, and thorough testing before your facility opens. The costliest mistakes happen early when installers drill holes in wrong locations or mix hardware from different manufacturers, so verify your measurements three times and consult your manufacturer’s installation guides to prevent these errors. Maintenance extends your partition system’s lifespan significantly-tighten all fasteners quarterly in high-traffic facilities, lubricate hinges annually with light machine oil, and inspect floor anchors for corrosion or movement to catch problems before they compromise structural integrity.
Contact professionals when your installation involves structural concerns, unusual floor conditions, or partition materials you have not worked with before. Heavy-duty vault hinges for solid plastic doors, stainless steel fasteners for phenolic partitions, and complex multi-row layouts all benefit from professional expertise that prevents alignment problems from cascading through your entire restroom. We at Partition Stalls offer free consultations to assess your specific restroom needs and recommend the right toilet partition hardware solutions for your facility type and traffic volume.
Contact Partition Stalls to discuss your restroom requirements and ensure your partition hardware installation succeeds from the start.